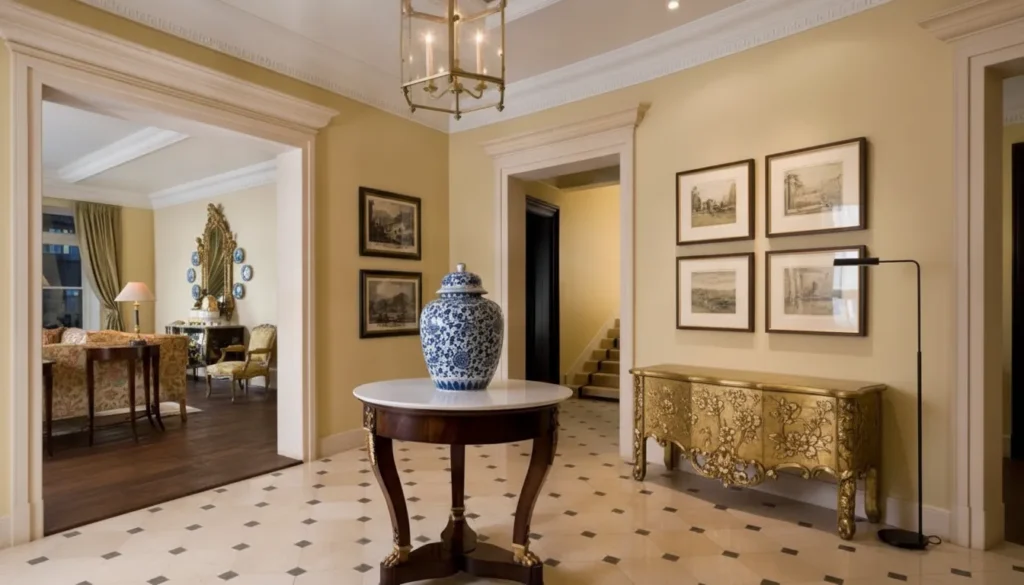
Artwork changes how a room is read. Its scale, surface, palette, and position influence circulation, furnishings, and atmosphere. Illumination should be considered alongside the collection rather than added once the interiors are finished.
Discuss a collection-first lighting plan with CW DESIGN
To understand how to light artwork in a luxury home, begin with the collection and the architecture around it. Assess each work’s medium, scale, viewing distance, daylight, and surrounding finishes. Then select refined fixtures and carefully controlled light that reveal color and texture without competing with the art.
CW DESIGN approaches this work on site, where sightlines, lived movement, and the character of each room can be understood together. That same collection-first discipline, explored in how to design around an art collection, provides the foundation for choosing layers, placement, and controls with both visual clarity and conservation in mind.
How to Light Artwork in a Luxury Home With a Collection-First Plan
CW DESIGN begins with the collection, not a fixture catalogue. To understand how to light artwork in a luxury home, first consider each work’s medium, scale, surface, and position within the room. Then study sightlines, daylight, circulation, and daily life before selecting layers of illumination that support both art and architecture.
A painting, photograph, textile, sculpture, or work beneath glass will respond differently to light. Oil paint may invite attention to texture, while a reflective surface can turn an otherwise elegant beam into a distraction. Scale matters equally: a large canvas may need broad, even coverage, while a smaller work may benefit from a more precise accent. The goal is not to make every piece equally bright, but to establish a considered visual hierarchy.
Begin by observing the artwork from the places where it will actually be seen. A collector may approach a work from a hall, view it while seated, or encounter it in passing during an evening at home. These sightlines reveal whether a fixture will enter the field of view, create glare, or leave the lower or outer edges in shadow. A starting angle near 30 degrees can help balance illumination and glare, but the actual work and viewing positions should determine the final adjustment. Explore CW DESIGN’s art-centric lighting design approach.
Daylight is part of the plan even when the intended atmosphere is intimate and controlled. Note the direction and intensity of natural light throughout the day, along with reflections from floors, windows, and polished furnishings. Window treatments, filtered daylight, and carefully placed artificial light can work together rather than compete.
Finally, layer the room so the artwork remains compelling without making the home feel like a commercial gallery. Ambient light establishes comfort, accent light gives the collection focus, and task or reading light supports how the room is used. Dimming and scene controls allow the balance to change for quiet evenings, entertaining, or close looking. This collection-first sequence produces a quieter result because every fixture has a reason to be there.
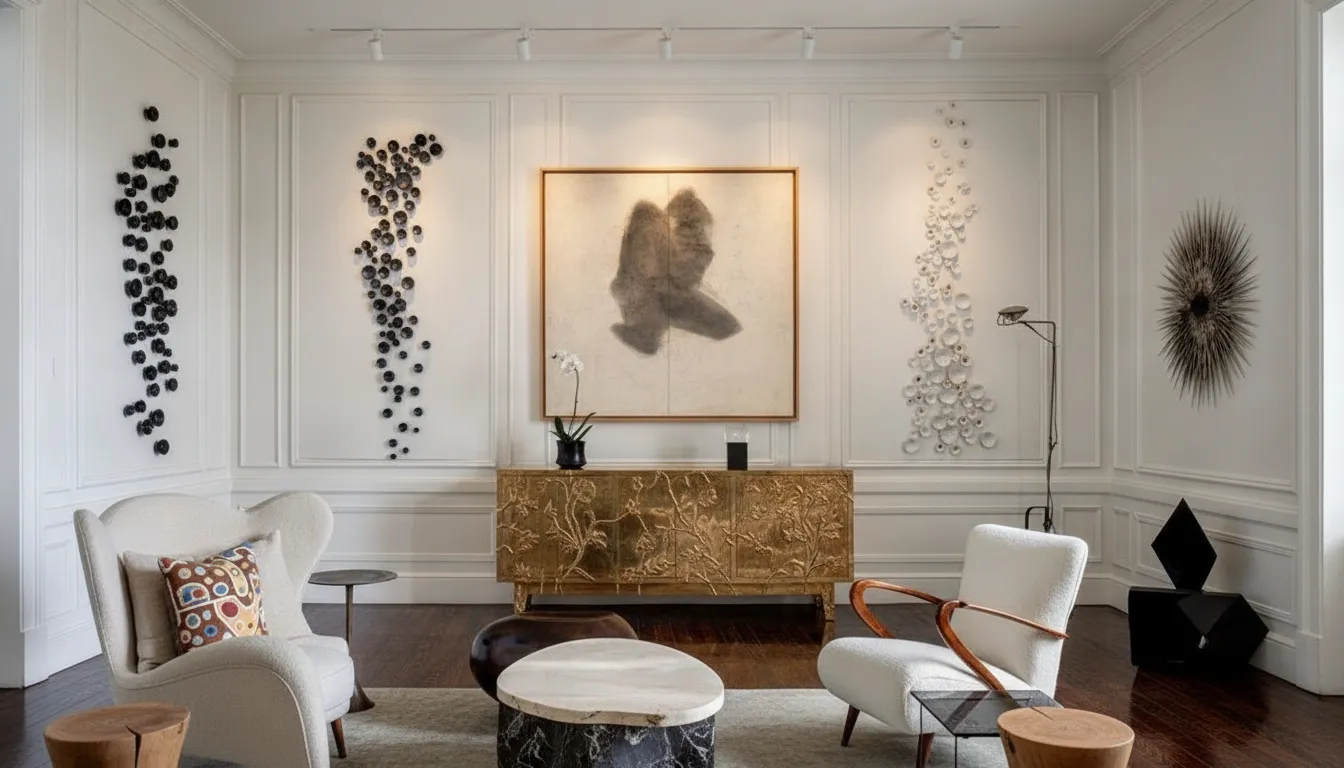
Which Fixture Works Best: Track, Picture, or Cove Lighting?
For a luxury residence, CW DESIGN selects the fixture that serves the artwork, architecture, and way the room is lived in. Track lighting offers adaptability, picture lights bring visible craftsmanship, and integrated cove lighting creates a concealed architectural effect. The right choice depends on scale, sightlines, beam spread, glare, and early coordination.
| Fixture | Best suited to | Primary character | Plan early for |
|---|---|---|---|
| Track lighting | Changing collections | Flexible and adjustable | Ceiling layout and aiming |
| Picture lights | Individual framed works | Visible, crafted detail | Frame depth and wiring |
| Cove lighting | Integrated architectural displays | Concealed and atmospheric | Millwork and ceiling recesses |
Track lighting for an evolving collection
Track systems are compelling where the collection may change. Fixtures can be repositioned as works move, and interchangeable optics allow the beam spread to respond to a small, textural object or a broad canvas. This adaptability is useful in a private gallery wall, but the hardware must still feel considered. A clean track line, carefully aligned with the architecture, is very different from a row of improvised spotlights.
Adjustable fixtures should illuminate the work broadly enough to avoid a bright isolated patch. A narrower beam can draw attention to texture and detail, while a wider spread creates more even coverage. Test both the beam and the viewing position in the actual room. Glazing, impasto, and reflective surfaces can change the result.
Picture lights for visible craftsmanship
A picture light makes the act of illumination part of the composition. Its arm, finish, scale, and relationship to the frame contribute a small but deliberate note of craftsmanship. It can be especially graceful over a single painting, a portrait, or a carefully arranged pair of works where the fixture is meant to be seen.
Because a picture light is tied to a particular frame, it is less forgiving when the collection changes. Confirm the frame profile, mounting height, cable route, and switch or dimmer location before installation. The fixture should wash the work evenly without creating a hot spot near the top edge.
Cove lighting for a quiet architectural effect
Integrated cove lighting conceals the source and lets the architecture carry the atmosphere. It can support a calm, gallery-like wall or softly illuminate a recess without placing a visible object above every frame. The effect is subtle, but it is not simple. Cove dimensions, reflective surfaces, access, diffuser details, and light distribution need to be resolved with the millwork and ceiling design.
Use it when the desired result is an architectural field of light rather than a fixture directed at one object. It may need to be supplemented with focused accent light when a painting requires stronger modeling or when a large wall contains works of different scale.
- Choose track lighting when flexibility matters most.
- Choose a picture light when visible detail belongs to the composition.
- Choose cove lighting when the source should disappear into the architecture.
- Test glare from the principal seating and circulation positions.
- Coordinate power, blocking, millwork, and ceiling work before finishes are fixed.
As a starting point, ceiling-mounted art lights are often aimed near 30 degrees toward the center of the work. This can balance coverage and glare. The angle must be tested on the actual piece and from real viewing positions. Lutron describes the 30-degree approach as a practical starting point. Early coordination allows the lighting to feel bespoke rather than added after the room is complete.
How to Light Artwork in a Luxury Home With Accurate Color and CRI
CW DESIGN approaches art lighting by testing how color behaves in the actual room, rather than prescribing one lamp for every work. The right solution considers the medium, palette, surrounding finishes, available daylight, viewing distance, and the hours when the collection is most often enjoyed.
Color temperature describes the visual warmth or coolness of the light. A warmer source can sit comfortably with aged woods, plaster, and richly toned textiles, while a cooler source may support a restrained contemporary interior or clarify cooler pigments. The choice should follow the artwork and its setting, not a trend or a fixture specification in isolation.
Daylight changes throughout the day, so a painting that appears balanced in the morning may read differently after sunset. Observe the work under its intended evening lighting, with nearby finishes and furnishings in place. Cream walls, polished stone, lacquer, and metallic surfaces can reflect color back onto the art or alter the apparent balance of the composition.
CRI is a useful starting point, not the whole assessment
Color Rendering Index, or CRI, indicates how faithfully a light source renders selected reference colors compared with a reference source. It can help narrow the field, but a high CRI alone does not guarantee that every hue, skin tone, glaze, or subtle neutral will appear as the artist intended. Spectrum, lamp quality, optics, and the specific work still matter.
For a more detailed evaluation, TM-30 assesses color rendition across a broader set of samples. It distinguishes fidelity from the character of a color shift. The U.S. Department of Energy provides technical guidance on the ANSI/IES TM-30 method. This gives a lighting professional useful language for comparing sources across varied media and palettes.
In practice, request samples or temporary aiming where possible. Compare saturated and muted passages, whites, dark grounds, metallic details, and the surrounding architecture from the principal viewing positions. The final setting should feel quiet and natural, with accurate color supporting the collection without making the light itself the subject.
How to Protect Artwork From Glare, UV, and Heat
CW DESIGN protects artwork by balancing viewing comfort with the needs of each medium, rather than applying one lighting formula throughout a home. Catherine Weinstock assesses glare, daylight, fixture position, heat, and exposure on site, then coordinates testing with the work, its framing, and conservator guidance where sensitivity demands it.
Begin with the viewing angle. A recessed, track, or picture light aimed directly at a glossy surface can produce a distracting reflection, especially on varnished paintings, glazed works on paper, and polished sculpture. Lutron identifies a 30-degree angle as a useful starting point for minimizing glare, but it is not a universal rule. Test from the principal seating and circulation positions, with the artwork installed at its final height.
Small changes can make a substantial difference. Shift the fixture laterally, raise or lower the beam, or use a narrower optic when the light spills onto glass or a nearby wall. Anti-reflective glazing may improve visibility, but glazing choices should suit the object and frame. A conservator or qualified framer should advise on sensitive works, particularly when changing glazing or exposure conditions.
Manage daylight before increasing electric light
Daylight changes throughout the day and can introduce both glare and cumulative exposure. Sheer window treatments, discreet shades, shutters, and carefully positioned furnishings can soften direct sun without making a room feel sealed off. Keep highly sensitive works away from strong, unfiltered daylight, and review the artwork at different times rather than judging the room under one afternoon condition.
Dimming is valuable because the appropriate intensity depends on the medium, surrounding finishes, viewing distance, and duration of exposure. A textile, watercolor, drawing, or other light-sensitive object may require a more conservative approach than a robust sculpture. There is no responsible universal brightness figure for every work. Exposure is shaped by intensity, spectrum, and time, so the plan should follow the object’s condition and the conservator’s recommendation.
Limit heat and unwanted spectrum
LEDs are a sensible starting point because Lutron notes that they emit minimal heat and UV radiation compared with older sources, but fixture specifications still matter. Select quality equipment, verify its optical performance, and keep heat-producing components from warming the frame, canvas, wall cavity, or enclosed display. Low heat does not remove the need for observation during commissioning.
For sculpture and three-dimensional objects, inspect shadows and hot spots from multiple sides. Light should describe form without concentrating energy on one fragile finish. For framed works, check the surface after the system has operated and confirm that dimming remains smooth at the levels the room actually uses. This quiet, evidence-led process preserves the atmosphere of a refined interior while keeping the collection at the center of the design.
How Should Art Lighting Be Planned Across a Whole Home?
CW DESIGN plans art lighting as part of the whole-home commission, beginning with an on-site assessment rather than selecting fixtures in isolation. The collection, architecture, furnishings, wall finishes, daylight, circulation, and electrical infrastructure are considered together, so each work is illuminated beautifully without disrupting how the home is lived in.
The process starts with the rooms as a sequence. A collector may encounter a painting from an entry hall, see it again from a stair, and then move toward a more intimate salon or library. Those sightlines influence the height, beam spread, aiming, and intensity of each fixture. Lighting should support the progression through the home, not make every wall compete for attention.
Wall finishes and furnishings matter just as much. A highly reflective surface can introduce distracting highlights, while a deep or textured finish may absorb more light. Furniture placement can block a beam, cast shadows, or place a visitor too close to the artwork. On-site review allows the design team to test actual viewing positions and coordinate art with circulation, upholstery, casework, and architectural details.
Infrastructure must be resolved before ceilings and walls are closed. A considered plan identifies track locations, recessed housings, picture-light power, access for future adjustment, and the circuits or control zones each room requires. It also leaves room for a collection to evolve. A detailed light plot can coordinate fixture placement across the home rather than treating every installation as a late decorative decision.
Dimming and controls should be designed around real routines. Separate zones may allow ambient light, artwork illumination, and entertaining scenes to work together. Individual dimming makes it possible to refine the balance between a delicate work and its surroundings. Warm, consistent light can create continuity, but the final setting should be judged against the particular medium, finish, and viewing distance.
Installation is part of the design, not the final handoff. Fixtures need to be aimed after the artwork, furnishings, and sightlines are in place. The team should check glare from glass, shadows beneath frames, spill onto adjacent walls, and the appearance of the work from the places where people actually sit and stand. Adjustments at this stage often matter more than choosing a fashionable fixture.
- Assess the collection, architecture, daylight, and principal viewing positions on site.
- Coordinate fixtures, power, controls, wall finishes, and millwork before construction is complete.
- Commission the system with the actual artwork and furnishings in place.
- Revisit aiming and intensity as the collection or room use evolves.
This whole-home coordination is distinct from general advice about displaying a collection. For a broader art-first approach to walls, layouts, and rooms, see lighting for art conservation within an art-collector interior. Here, the concern is how planning, infrastructure, controls, and commissioning allow the collection to remain visually connected across a complete residence.
Frequently Asked Questions
What is the ideal angle for lighting artwork?
A 30-degree starting angle from the wall often balances even illumination with reduced glare and shadowing. It is not a fixed rule for every frame or room. Test the beam from the primary viewing positions and adjust for the artwork’s surface, height, and surrounding daylight. Lutron describes 30 degrees as a practical starting point.
How do you avoid glare when lighting art behind glass?
Keep the beam from reflecting directly toward the viewer, then check the work while standing and moving through the room. A carefully selected beam spread, adjustable fixture, dimmer, and conservation-grade non-reflective glazing can improve visibility. The right solution depends on the frame depth, glass, surface texture, and sightlines.
What types of lighting are best for art in a luxury home?
Track lighting suits collections that may change, while picture lights offer a more tailored architectural gesture. Recessed or pin fixtures can keep the source discreet, and cove lighting can provide a softer ambient layer. A curated plan may combine these approaches rather than rely on one fixture throughout the home.
How do you choose the right light for different types of frames?
Begin with the frame’s width, depth, finish, and projection from the wall. A broad frame or large work may need an evenly distributed beam, while a narrow or ornate frame may call for careful aiming to prevent highlights on gilded surfaces. Always evaluate the actual work, not only its dimensions.
How can I prevent light damage to my fine art collection?
Use low-heat LED fixtures with appropriate UV performance, avoid direct sunlight, and manage both intensity and exposure time. Sensitive works, including works on paper and some organic materials, require medium-specific guidance from a qualified conservator. Dimming and scene controls can help reduce unnecessary exposure while preserving a composed evening atmosphere.
Artwork lighting should feel as considered as the collection itself: quiet in its presence, precise in its effect, and integrated with the architecture of the residence. CW DESIGN works on site to understand the space, the art, and the way the home will be lived in before developing a bespoke direction.
Pingback: Integrating Sculpture Into Interior Design – CW DESIGN
Pingback: Interior Design for Contemporary Art Collectors – CW DESIGN