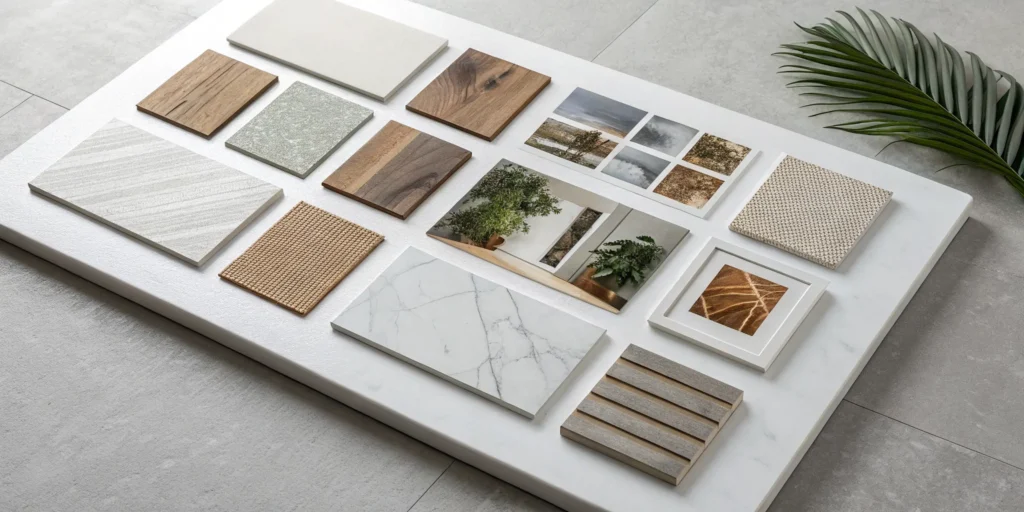
You likely have a folder of saved images and a mind full of ideas for your home. The challenge isn’t a lack of inspiration, but a lack of a clear, cohesive direction. This is precisely the problem an interior design mood board is built to solve. It’s a disciplined and creative process that takes a wealth of scattered ideas and distills them into a focused, intentional vision. Instead of feeling overwhelmed by infinite choices, the mood board provides a curated roadmap. It helps you edit with purpose, define your palette, and see the big picture, ensuring the final design feels harmonious and deeply personal.
Key Takeaways
- Establish Your Vision First: Use a mood board as a visual blueprint to set the emotional tone and style for your project. This simple step helps you avoid expensive mistakes and ensures the final design is perfectly cohesive.
- Build a Complete Visual Story: A successful mood board is more than just pretty pictures; it’s a curated narrative. Intentionally combine core elements like color palettes, material samples, furniture styles, and inspirational images to create a focused vision for your space.
- Follow a Process but Stay Flexible: Start by defining your room’s purpose, gather inspiration, and then edit your board down to its essential ideas. Always test physical samples in your space and treat the board as a working document, refining it until the vision feels right.
What Is an Interior Design Mood Board?
Think of a mood board as the first chapter of your design story. It’s a visual collage, a curated collection of images, textures, and colors that captures the soul of a space before a single piece of furniture is ordered. At its core, a mood board is not about specifics; it’s about feeling. It’s where we translate your personality, lifestyle, and aspirations into a tangible visual language. This is the very beginning of our creative process, the point where we explore the overall style, mood, and aesthetic direction for your home or commercial property.
Before we get into floor plans or fabric selections, we build this visual foundation. It’s a creative sandbox where ideas can be played with freely, ensuring the final design feels authentic to you. For us, it’s a critical tool for communication, creating a shared vision that guides every subsequent decision. By gathering inspirational images, color palettes, and material samples, we establish a clear and cohesive concept. This ensures that our design philosophy, which blends artistry with functionality, aligns perfectly with your unique vision for the space, setting the stage for a home that is both timeless and deeply personal.
Physical vs. Digital Boards
The choice between a physical or digital mood board really comes down to process and preference. A physical board offers a tactile experience that I find incredibly valuable. There’s something special about pinning up real fabric swatches, feeling the texture of a wallpaper sample, or arranging paint chips under different lighting. This method allows you to engage with materials in a tangible way, creating a collage with depth and dimension. It’s a classic approach that truly helps in visual storytelling for your project.
Digital boards, however, offer incredible flexibility. Using tools like Pinterest, you can quickly gather images, experiment with layouts, and make changes with a simple click. They are easy to share and allow you to pull in specific furniture or lighting directly from websites. Often, the best approach is a hybrid one: starting digitally to explore ideas and then creating a physical board to refine the key textures and materials.
Mood Board vs. Design Plan: What’s the Difference?
It’s easy to confuse a mood board with a design plan, but they serve two very different purposes. Think of it this way: the mood board is the “why,” while the design plan is the “how.” A mood board is your conceptual North Star. It’s a collection of inspirational images and materials that communicates the overall feeling, style, and aesthetic direction of your project. It’s meant to evoke an emotional response and ensure everyone is aligned on the creative vision before moving forward.
A design plan, in contrast, is the practical, actionable blueprint for bringing that vision to life. It’s a detailed document that includes concrete elements like scaled floor plans, furniture layouts, electrical plans, specific product selections with dimensions and pricing, and a project timeline. While the mood board captures the spirit of the design, the design plan outlines the precise steps and specifications needed for execution. The mood board sets the tone; the design plan provides the instructions.
Why a Mood Board Is Essential to Your Design Process
A mood board is so much more than a pretty collage; it’s one of the most critical steps in the entire interior design process. Think of it as the visual blueprint for your project, the foundational story that guides every decision to follow. Before we even think about floor plans or furniture sourcing, we use a mood board to explore and define the aesthetic and emotional direction of your space. By gathering a curated collection of images, material samples, and color swatches, we create a tangible representation of the final vision. This process is essential because it aligns our creative direction with your personal style from the very beginning. It’s a strategic tool that ensures every choice is intentional and contributes to a cohesive whole. It’s where we test how a bold color might pair with a classic texture or how a modern light fixture can complement antique furniture. Ultimately, taking the time to perfect a mood board saves you time and money, prevents any unwelcome surprises down the line, and builds the confidence needed to bring an ambitious design to life. It’s the essential first step in transforming a house into a home that truly reflects you.
See the Big Picture Before You Commit
A mood board is essentially a visual collage of ideas for a design project. It’s a curated collection of images and materials that helps you and your designer plan a room’s atmosphere from the very beginning. This process allows us to establish the style, mood, colors, and overall feel of a space before diving into the specifics of floor plans and furniture selection. It’s less about picking the exact sofa and more about capturing the feeling you want the room to evoke, whether that’s serene and minimalist or vibrant and eclectic. This initial step is fundamental to our design philosophy, ensuring the final space is a true reflection of your identity.
Avoid Costly Design Mistakes
One of the most practical benefits of a mood board is its ability to help you avoid potentially costly mistakes. It’s far easier and less expensive to swap out an image on a board than it is to return a custom-made piece of furniture or repaint an entire room. The mood board acts as a low-risk sandbox where we can experiment with different ideas and combinations. This process helps inform the design direction and ensures we’re on the right path before making significant financial commitments. By finalizing the vision at this stage, you can move forward with confidence, knowing that you’re investing in a design that you truly love and that works as a whole, avoiding some of the most common design mistakes.
Ensure a Cohesive Design
A mood board is the key to achieving a harmonious and unified look. It serves as a visual story, combining various elements like color schemes, textures, materials, and inspirational images into a single, cohesive narrative. Throughout the project, this board becomes our North Star, guiding every choice to ensure all the individual pieces work together seamlessly. From the texture of a throw pillow to the finish on a light fixture, every detail is selected with the overall vision in mind. This prevents the space from feeling disjointed or random and instead creates a thoughtfully curated environment where every element feels like it belongs.
Streamline Designer-Client Communication
Words can sometimes fall short when describing a visual concept, which is where a mood board truly shines. It acts as a powerful communication tool that helps designers show their ideas clearly to clients. Instead of trying to explain a feeling or an abstract idea, we can present a tangible vision that you can see and respond to. This visual dialogue ensures everyone is on the same page from the outset, fostering a collaborative and transparent relationship. It allows you to understand the proposed design before it’s built, giving you the opportunity to provide feedback and feel completely connected to the creative process.
The Essential Elements of a Mood Board
Think of a mood board as the visual story of your future space. It’s where we gather all the beautiful, disparate ideas floating around and see how they interact. Before a single piece of furniture is ordered or a wall is painted, the mood board serves as our compass, ensuring every choice we make contributes to a single, cohesive vision. It’s a curated collection of images, materials, and colors that captures the specific feeling, or mood, you want your home to evoke.
A well-crafted board moves a project from abstract concepts to a tangible design direction. It’s not just a collage; it’s a strategic tool that helps us define a project’s style and mood from the very beginning. By bringing together the core components of a design, we can test ideas, refine the concept, and build a strong foundation for a space that feels intentional and deeply personal. These key elements are the building blocks of that foundation.
Color Palettes
Color is the emotional heartbeat of a room, and your mood board is the perfect place to define its rhythm. This is where you’ll experiment with the hues that will form the backdrop of your space. Start by gathering images and swatches that represent your primary, secondary, and accent colors. Think beyond just paint chips; include photos of landscapes, textiles, or artwork that capture the exact shades you’re drawn to. This process helps you see how colors interact and ensures the final palette feels balanced and harmonious, setting the intended psychological tone for the room.
Textures and Materials
Texture is what gives a space depth and a tactile quality, making it feel rich and inviting. Your mood board should include a variety of materials you envision using. For a physical board, this means collecting actual samples: a piece of velvet, a swatch of linen, a chip of marble, a wood finish, or a metal sample. For a digital board, use high-resolution photos that clearly show the material’s surface and finish. Layering these elements helps you understand how different textures will play off one another, adding a layer of sensory sophistication that is essential to a well-rounded design.
Furniture and Accessories
This part of the mood board is less about selecting the exact final pieces and more about defining their style and form. Are you drawn to the clean, sculptural lines of modern furniture or the intricate details of classic pieces? Gather images of sofas, chairs, lighting, and casegoods that embody the aesthetic you’re aiming for. This helps establish the overall silhouette and character of the room’s contents. Including accessories, like vases, mirrors, or hardware, further refines the vision and ensures every object, no matter its size, aligns with the design’s core concept and contributes to the visual narrative.
Inspirational Imagery
Inspirational images are the soul of your mood board. These pictures might not have a literal place in the final design, but they capture the intangible feeling you want the space to have. This could be a photograph of a serene coastline that inspires a tranquil bedroom, a piece of abstract art that sets a dynamic tone for a living room, or an architectural detail from a historic building. These images act as a creative touchstone, reminding us of the overarching story and emotional goal. They ensure the design is not just a collection of nice things but a true expression of a feeling and a point of view.
How to Create Your Mood Board: A Step-by-Step Guide
Creating a mood board is a deeply personal and creative process, but it benefits from a clear structure. Think of it as building a visual story for your space, one layer at a time. Following a step-by-step guide helps you move from a vague idea to a focused, actionable design concept. This structured approach ensures that no detail is overlooked and that the final board is a true reflection of your vision, not just a collection of pretty pictures. It allows you to explore freely before editing with intention.
At our firm, we use this exact process to translate a client’s identity into a tangible design direction. It’s a foundational part of our collaborative method, ensuring the final space feels both intentional and uniquely personal. By following these steps, you can bring a professional touch to your own design planning, creating a roadmap that will guide every decision you make, from paint colors to furniture selection. This process turns abstract feelings into a concrete visual plan.
Step 1: Define the Space and Its Purpose
Before you gather a single image, start with a simple question: What is this room for? A mood board is a tool for the initial planning phase, so its primary job is to help you explore ideas and define the general style and feel of a room. Think about the practical function of the space. Is it a lively kitchen for entertaining, a tranquil bedroom for rest, or a productive home office? Also, consider the emotional response you want the room to evoke. Should it feel energizing, calming, sophisticated, or cozy? Answering these questions provides a strong foundation for your entire project.
Step 2: Establish a Clear Concept
With the room’s purpose defined, you can now establish a clear design concept. This is where you translate the feeling you want to create into a specific aesthetic direction. A mood board is a visual collection of ideas that shows the overall style you want to achieve. For example, if your goal is a “calm and airy living room,” your concept might be “coastal modern” or “minimalist Scandinavian.” Giving your project a name or a theme helps focus your inspiration gathering and ensures every element you choose serves a unified vision. This concept will be your North Star throughout the design process.
Step 3: Gather Inspiration
Now for the fun part: collecting inspiration. Start gathering images of rooms, color schemes, furniture, and art that you love. Use platforms like Pinterest to create a digital board, or flip through design magazines and books. At this stage, try not to overthink it. Let your intuition guide you and simply save what appeals to you. Don’t worry about whether everything “goes together” just yet. The goal is to cast a wide net and collect a wealth of visual data. You can pull from architecture, fashion, nature, or travel photos, anything that captures the feeling you’re after.
Step 4: Arrange and Build Your Board
Once you have a healthy collection of images, it’s time to start arranging them. If you’re working digitally, tools like Canva or Milanote allow you to easily drag and drop images, text, and color swatches to create a professional-looking board. If you prefer a hands-on approach, get a large foam board and start pinning physical items like fabric swatches, paint chips, and printed images. As you place items, you’ll begin to see how different colors, textures, and shapes interact. Group similar items together and play with the layout until it starts to feel balanced and cohesive.
Step 5: Edit Ruthlessly and Refine Your Palette
This is perhaps the most critical step. A common mistake is trying to include every single idea you love. Now, you must edit. Take a step back from your board and look for the common threads. What colors, materials, and styles appear most often? Start removing anything that feels like an outlier or doesn’t support your core concept. This process of elimination helps you refine your vision and distill your broad inspiration into a focused design palette. Your board should feel curated and intentional, with every element working together to tell a single, cohesive story.
Step 6: Test Your Palette in the Actual Space
Your mood board is a fantastic guide, but colors and textures can look dramatically different in person. Before committing to any major purchases, bring your palette into the actual room. Get physical samples of your key materials: paint swatches, fabric cuttings, flooring samples, and metal finishes. Observe them in the room’s natural light throughout the day, from morning to afternoon and into the evening with artificial light. As recommended by paint experts at Farrow & Ball, you should always test paint on the wall to see how it truly behaves in the space before you commit to a full gallon.
Step 7: Review and Iterate
Finally, treat your mood board as a living document. It’s a tool for refinement, not a rigid set of rules. After testing your materials in the space, you may find that a certain fabric doesn’t work or a paint color feels off. That’s perfectly fine. The mood board allows you to put your ideas together in one place, then step back to see what works and what doesn’t. Don’t be afraid to swap elements out and continue refining the board until it feels just right. This iterative process ensures your final design is thoughtful, cohesive, and perfectly aligned with your original vision.
Our Go-To Mood Board Tools
With so many digital and physical tools available, choosing the right one to build your mood board can feel like a project in itself. The truth is, there’s no single best option. The right tool for you depends on your technical comfort, the project’s scope, and how you prefer to organize your ideas. In our studio, we use a mix of platforms, from powerful professional software for client presentations to simple, free apps for quick brainstorming. We even have a deep appreciation for the classic physical board.
To help you find your perfect fit, we’ve compiled a list of our favorite tools. We’ve included everything from beginner-friendly platforms to the industry-standard software we use to create the sophisticated, bespoke designs our clients love. Think of this as your curated guide to the best resources for bringing your vision to life, whether you’re just starting to gather ideas or are ready to build a polished, professional presentation. Each tool offers a unique way to visualize your project, so feel free to experiment and find the one that clicks with your creative process.
Canva (Free & Paid)
If you’re looking for a user-friendly and widely accessible tool, Canva is an excellent place to start. Many people are already familiar with its simple drag-and-drop interface, which makes the learning curve practically nonexistent. You can begin with a blank canvas and upload your own inspiration images, or you can use one of their ready-made templates designed specifically for interior design. A great feature for color planning is the ability to find a paint color’s hex code online and use it to create a background or digital color swatch. While it has a robust free version, the paid option offers even more features for those who want to get more detailed.
Pinterest (Free)
We often think of Pinterest as the first step in any design journey. It’s less of a board-building tool and more of a massive visual library perfect for gathering initial inspiration. You can create a new board for your project and start pinning images of rooms, furniture pieces, color schemes, and architectural details that catch your eye. For a more focused board, try searching for individual items on clean backgrounds. A helpful tip is to use the Pinterest browser button to pin products directly from retail websites, which helps you keep track of where to find them later. It’s the perfect digital scrapbook for your earliest ideas.
Milanote (Free & Paid)
Think of Milanote as a digital studio wall where you can freely arrange your thoughts. It strikes a nice balance between the unstructured feel of Pinterest and the organized layout of Canva. You can drag and drop images, notes, and color swatches onto an infinite canvas, allowing you to see how different elements relate to one another. One of its most useful features is the ability to add links to your board, so you can easily return to the source of a piece of furniture or a specific material. With both free and paid versions available, it’s a flexible tool that can grow with your project’s complexity.
DesignFiles (Paid)
When we need a tool built specifically for the demands of professional interior design, DesignFiles is a fantastic option. This paid platform is engineered to streamline the design process from start to finish. Its browser clipper lets you save products from any online store directly to your personal library, automatically capturing the image, price, and product link. From there, you can simply drag and drop items onto your board. This functionality is incredibly efficient for sourcing and budgeting, making it a favorite among designers for creating detailed, shoppable design plans for clients. It’s a powerful tool for anyone serious about managing a full-scale design project.
Adobe Creative Cloud (Paid)
For ultimate creative freedom and a truly professional finish, nothing compares to the Adobe Creative Cloud suite. Tools like Illustrator and InDesign offer limitless control over every aspect of your mood board. Here, you can layer images, manipulate colors with precision, add custom text, and arrange elements without the constraints of a template. This is the software we often turn to for our final client presentations, as it allows us to create a polished and completely custom visual narrative. While there is a subscription cost and a steeper learning curve, the professional results are unmatched for those who need complete control.
The Classic Method: Physical Boards
In a digital world, there is still something irreplaceable about a physical mood board. This hands-on method, using foam board, magazine clippings, fabric swatches, and real paint samples, offers a tactile experience that a screen cannot replicate. It allows you to feel the texture of a textile next to a wood finish and see how colors shift in the room’s actual light. This approach connects directly to the artistry and craftsmanship we value at CW DESIGN. As our firm’s philosophy is rooted in the fusion of art and function, we believe that engaging with tangible materials is a vital step in creating a space that feels authentic and deeply personal.
Common Mood Board Mistakes to Avoid
Creating a mood board is an exciting part of the design process, but a few common missteps can turn a tool for clarity into a source of confusion. Think of your mood board as the foundation of your project; if it’s not solid, the entire structure can feel off. By being mindful of these potential pitfalls from the start, you can ensure your board is a powerful and effective guide for your design. These are the mistakes I see most often and how you can steer clear of them to create a board that truly captures the essence of your vision.
Overloading the Board
It’s tempting to pin every beautiful image and fabric swatch you find, but a mood board is not a scrapbook. Its purpose is to distill your vision, not to document every single idea. One of the biggest mistakes is putting too many competing concepts in one place. This dilutes the message and makes it difficult to see a clear direction. Instead of creating clarity, an overloaded board creates visual noise. A successful mood board is edited and curated. For every element you add, ask yourself if it directly supports the core feeling and function of the space. If it doesn’t, let it go.
Forgetting Balance and Flow
A mood board should be more than just a collection of images; it should tell a visual story. How you arrange the elements is just as important as what you include. A common oversight is forgetting to create a sense of visual balance and flow. If you have several dark, heavy textures or images, disperse them with lighter, airier elements. This creates a natural rhythm that guides the eye across the board, making the overall concept easier to digest. Think about creating a visual hierarchy that highlights your most important ideas. This thoughtful composition makes the board feel harmonious and intentional, much like a well-designed room.
Ignoring Real-World Context
A gorgeous mood board is only useful if it can be translated into your actual space. It’s a mistake to create a vision in a vacuum, without considering the practical realities of the room you’re designing. Always keep the room’s existing architecture, the amount of natural light it receives, its scale, and its intended purpose at the forefront of your mind. A dramatic, dark-hued concept might look stunning on your board but could feel oppressive in a small room with little sunlight. Grounding your inspiration in reality ensures the final design is not only beautiful but also functional and appropriate for the environment, a principle we hold dear in our own design philosophy.
Committing Too Soon
Your mood board is a working document, not a final contract set in stone. It’s easy to become attached to your initial creation, especially after spending time perfecting it. However, the design process is one of discovery, and it’s natural for your vision to evolve as you explore different ideas. Be open to revising your board. Don’t be afraid to deconstruct it, swap elements, or even start over if something isn’t feeling right. This flexibility is key to a refined outcome. The most successful designs often come from an iterative process of testing ideas and making adjustments until the vision is perfectly clear.
How to Present a Mood Board to a Client
This is the moment where your vision starts to feel real for the client. Presenting your mood board is less of a formal reveal and more of a guided conversation. It’s your opportunity to walk your client through your creative process and show them how their personal story, needs, and aspirations have been translated into a tangible design direction. The goal is to connect with them on an emotional level, helping them see and feel the atmosphere you envision for their space. Before you even show them the board, set the stage. Explain that the mood board is a starting point, a visual tool meant to spark discussion and ensure you’re both aligned before moving forward with detailed plans and purchases.
Your presentation should be a story. A mood board is more than just a collection of images; it’s a powerful tool for crafting a visual narrative that brings your interior design vision to life. As you present, you’ll connect the dots between the abstract ideas discussed in your initial meetings and the concrete elements on the board. This is your chance to demonstrate your expertise and build confidence, showing the client that you’ve not only heard them but have also applied a professional, artistic lens to their vision. Remember, this is a collaborative moment that sets the tone for the rest of the project.
Explain Your Design Rationale
When you walk a client through a mood board, you’re telling the story of their future space. Don’t just point to images; explain the why behind every choice. Connect each element back to your initial conversations. For instance, you might say, “You mentioned wanting a serene retreat, which is why I’ve anchored the color palette with these calming blues and earthy neutrals.” By articulating your thought process, you transform a collection of pretty pictures into a cohesive, intentional plan. This approach helps clients understand how each texture, color, and furniture piece contributes to the overall vision, making them feel seen and understood. It’s this thoughtful articulation that builds a foundation of trust and excitement for the project ahead.
Gather Feedback While Protecting the Vision
Once you’ve explained your rationale, it’s time to listen. Encourage open and honest feedback by asking targeted questions. Instead of a simple “What do you think?”, try asking, “How does this combination of textures make you feel?” or “Does this style of lighting align with how you imagine using this room at night?” This invites more specific and useful responses. Your role is to streamline client communication while gently guiding the conversation. If a client’s suggestion conflicts with the core concept, explain the potential impact and propose an alternative that honors their feedback while preserving the design’s integrity. This maintains a strong foundation for a successful project.
Refine with Purpose
A mood board is a living document, and the feedback stage is where it truly comes to life. Use the client’s input to make purposeful refinements. This step isn’t about starting over; it’s about making targeted swaps that strengthen the concept. Perhaps a client loves the overall feel but is hesitant about a specific pattern. This is your chance to find an alternative that achieves the same effect while resonating more deeply with them. The mood board allows you to put your ideas together and make these adjustments easily, ensuring the final direction is a perfect blend of your vision and the client’s personality before any costly commitments are made.
Frequently Asked Questions
How specific should I get with furniture and decor on my mood board? Think of your mood board as establishing the character, not casting the exact actor. It’s more important to define the style, shape, and material of the furniture than to pick the final piece. For example, instead of finding the exact sofa, you would gather images of sofas with a similar silhouette, leg style, and fabric type. This helps you lock in the aesthetic direction without getting bogged down in sourcing specific items too early in the process.
Is a digital or physical mood board better for my project? There is no single right answer, as both have their strengths. Digital boards are fantastic for quickly gathering a wide range of inspiration and experimenting with layouts. Physical boards are invaluable for understanding the tactile experience of a room, letting you feel a fabric swatch next to a wood sample. I often recommend a hybrid approach: start digitally to explore broadly, then create a small, focused physical board with your final material and color selections to test in the actual space.
What if I like too many different styles? How do I focus my mood board? This is a very common challenge. The key is to move from collecting to curating. Once you have all your inspiration in one place, take a step back and look for the common threads. You might find that even though the styles seem different, you are consistently drawn to a particular color palette, a certain level of formality, or a specific type of material. Your job is to find that overlap and build your board around it, letting go of the beautiful ideas that don’t fit into that core story.
Can I just use my Pinterest board as my final mood board? Think of your Pinterest board as your inspiration library and your mood board as the single, cohesive story you write using that library. Pinterest is the perfect place for step one: gathering everything that catches your eye. A true mood board, however, is the result of editing those pins down to a focused concept. It requires you to select only the most essential images and arrange them thoughtfully on a separate canvas, like Canva or a physical board, to create a clear and intentional design direction.
How do I know when my mood board is actually finished? Your mood board is finished when it feels both complete and clear. It should tell a consistent visual story without any distracting elements that feel out of place. A good test is to look at it and try to describe the room’s feeling in one simple sentence. If every image, color, and texture on the board supports that sentence, you have a strong, finished concept. It’s less about spending a certain amount of time and more about achieving that powerful sense of focus.